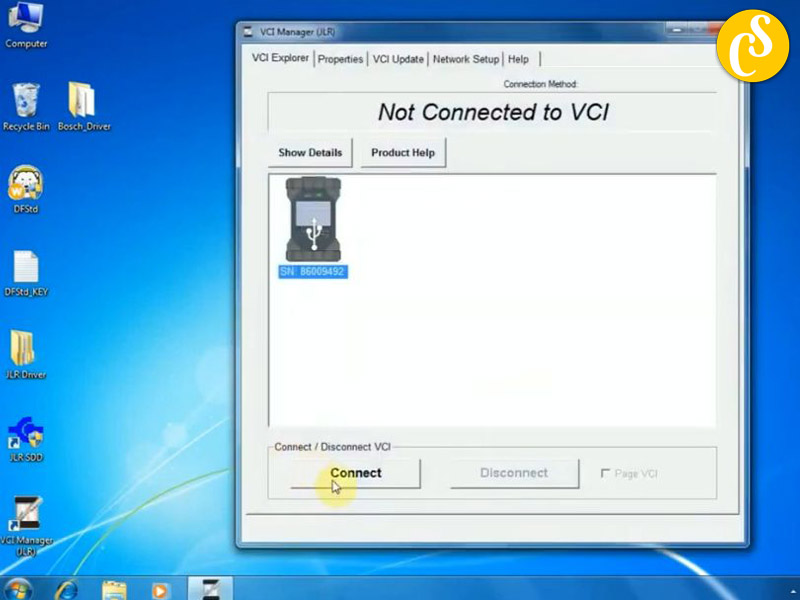
The JLR DoIP VCI (Diagnostic Communication Interface) stands out as an indispensable tool for diagnosing and resolving issues in your JLR vehicle. However, configuring the VCI to seamlessly integrate with both JLR SDD and Pathfinder can prove to be a nuanced process. In this comprehensive guide, we’ll meticulously walk you through each step, ensuring a smooth setup.
Essential Tools and Software
Before delving into the setup, it’s imperative to gather all the necessary tools and software to facilitate a seamless configuration. Here’s a checklist of what you’ll need:
- JLR DoIP VCI device: This DOIP interface establishes a diagnostic communication link with your JLR vehicle’s OBD-II port. Ensure the VCI Manager software is installed for optimal connection management.
- JLR SDD software: The primary diagnostic and repair software designed for JLR vehicles ranging from 2005 to 2016.
- Pathfinder software: Geared towards advanced diagnostics and programming, this software is commonly employed by dealerships and seasoned technicians. It’s compatible with JLR vehicles manufactured between 2016 and 2022, as well as TOPIx Cloud for 2022-2023.
- Laptop with Windows 7 or higher: Ensure your laptop meets the minimum system requirements for both JLR SDD and Pathfinder.
- Ethernet cable: A sufficiently long cable to connect your JLR DoIP VCI to your laptop.
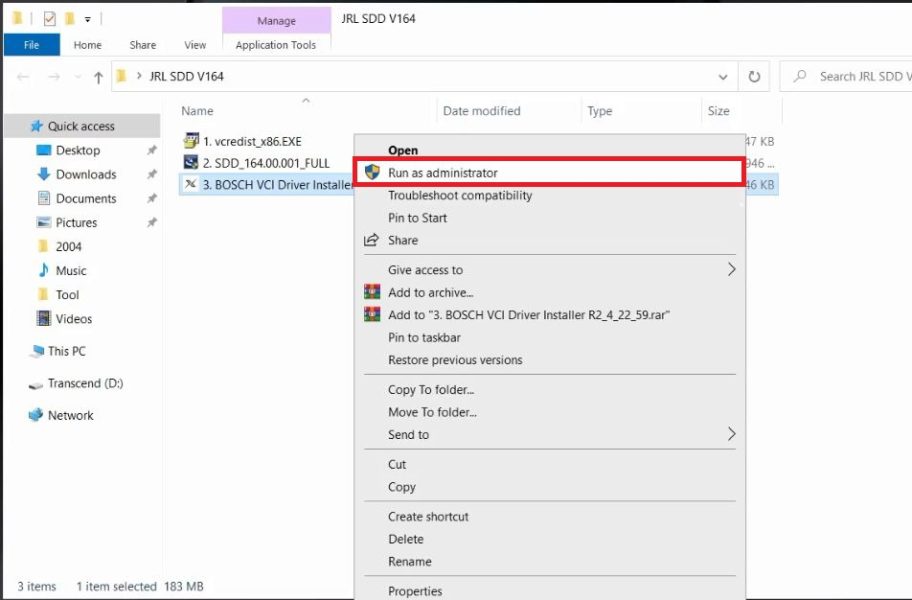
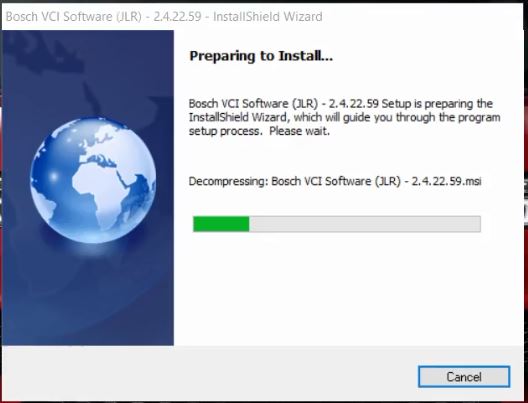
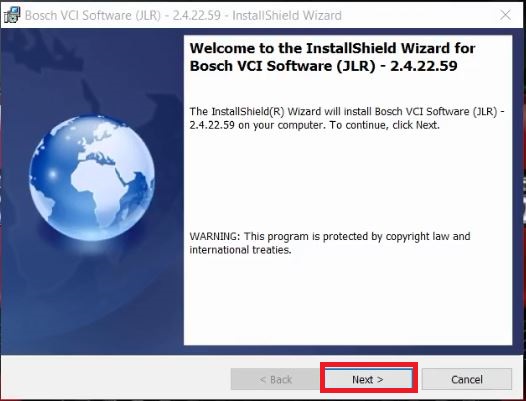
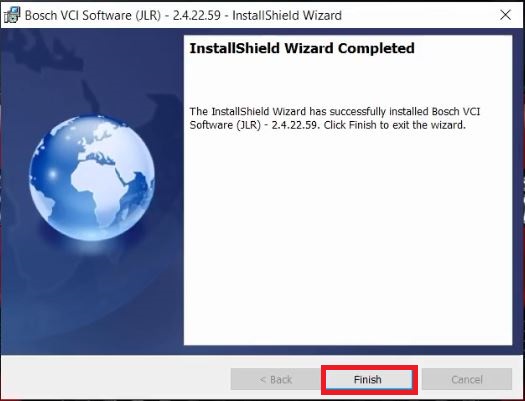
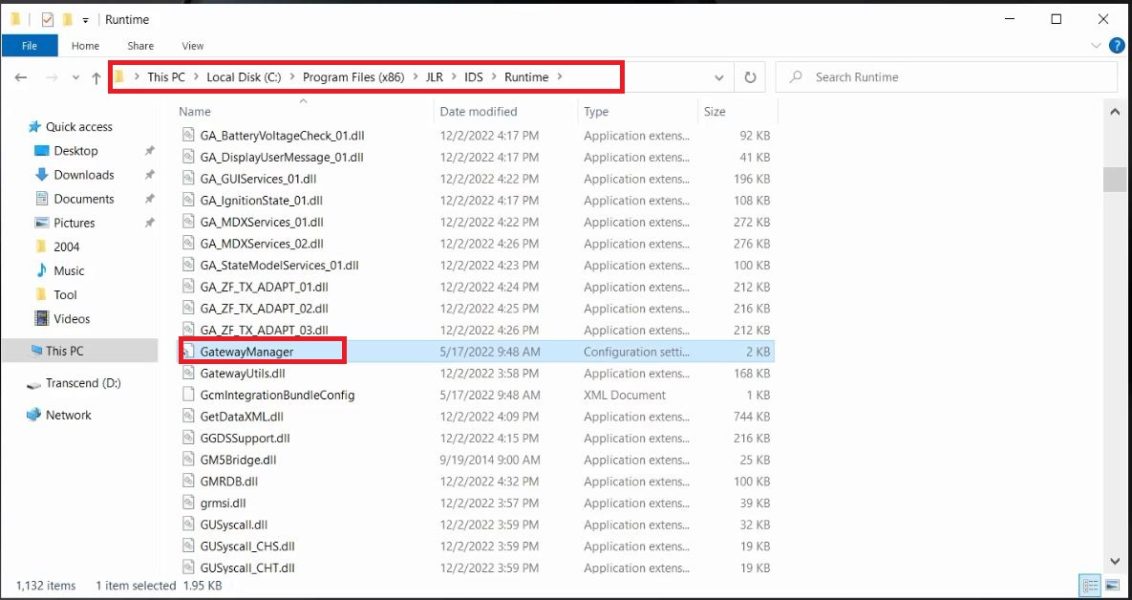
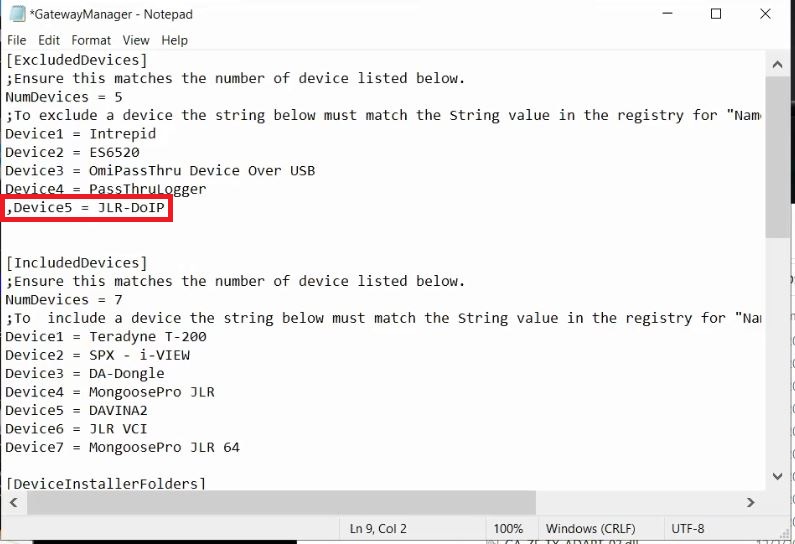
Setup JLR DoIP VCI Driver
Download JLR DoIP VCI Driver: Here
Connecting Your JLR DoIP VCI to Both JLR SDD and Pathfinder
Now that both JLR SDD and Pathfinder are set up, connect your JLR DoIP VCI to both software programs for comprehensive diagnostics and programming. Follow these steps:
Connecting Your JLR DoIP VCI to JLR SDD
- Ensure your JLR DoIP VCI is connected to your laptop via the Ethernet cable.
- Open the JLR SDD software and navigate to the “Diagnostic Program” menu.
- Click “Start” to initiate the diagnostic program.
- In the “Vehicle Identification” menu, select the appropriate vehicle model and year.
- Follow on-screen instructions to diagnose and repair any issues.
Connecting Your JLR DoIP VCI to Pathfinder
- Confirm your JLR DoIP VCI is connected to your laptop via the Ethernet cable.
- Open the Pathfinder software and navigate to the “Diagnostics” menu.
- Click “Connect to vehicle” and choose the appropriate vehicle model and year.
- Follow on-screen instructions for diagnostics and repairs.
Switching Between JLR SDD and Pathfinder
To seamlessly switch between JLR SDD and Pathfinder, follow these steps:
- Disconnect your JLR DoIP VCI device from one software program.
- Connect it to the other.
- Repeat setup steps if frequently switching between programs.
In conclusion, with this detailed guide, you’ve successfully configured your JLR DoIP VCI to work seamlessly with both JLR SDD and Pathfinder. These steps ensure a robust setup for comprehensive diagnostics and programming, empowering you to efficiently diagnose and resolve issues in your JLR vehicle.
Related Posts:
Download and Installation Land Rover Jaguar JLR SDD Software V164
JLR Pathfinder Diagnostic Software Download And Installation
How To Install VXDIAG VCX SE DOIP VCX NANO Driver For JLR SDD
How To Setup JLR DoIP VCI For SDD and Pathfinder
When To Use Pathfinder, SDD or IDS for Your Jaguar Land Rover Range Rover
CARSOFTZ – Your Diagnostic Journey, Our Software Excellence
- Website: Carsoftz.com
- Youtube: Carsoftz Official
- Fanpage: Carsoftz
Whatsapp: +84.977.889.159| Open: 8:00 – 22:00 (GTM +7)

