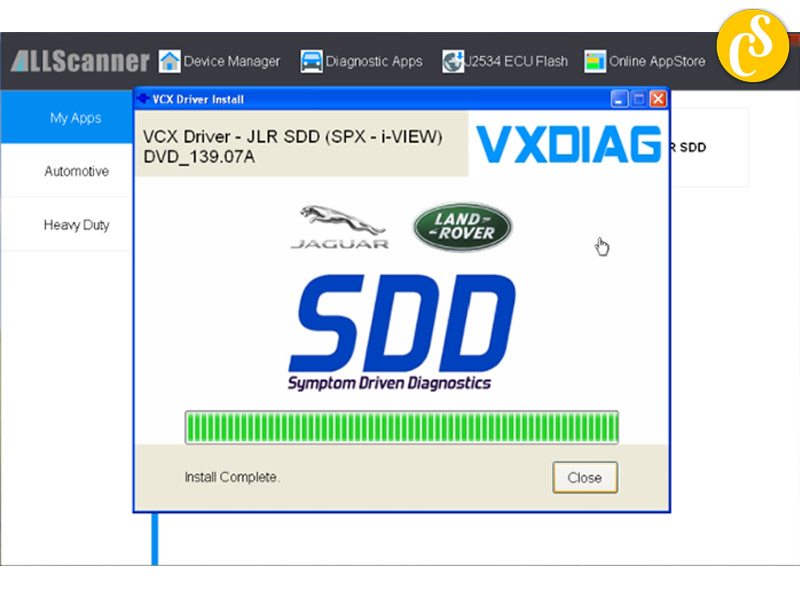
Step 1: VXManager Installation
In order to commence the vehicle diagnostic process seamlessly, the installation of VX Manager and its associated drivers is imperative. These software components can be sourced from the provided CD-ROM or downloaded directly from our website for the latest setup files.
System Requirements
- Processor: Pentium 4/1.6GHz or higher
- Memory: 2GB RAM or more
- Hard Disk: 40GB or more
- Display: Resolution 1024×768 or higher
- Network Interfaces: LAN 10/100M or 802.11b/g
- Communication Interface: USB 2.0 or USB 3.0
- Operating System: Windows XP/Vista/Win7/Win8/Win8.1
Installation Steps
- Run VX Manager.exe to initiate the setup.
- Click [Next].
- Select [I accept the agreement], then click [Next].
- During installation, disconnect the USB cable from the PC, then click [Next].
- Software Installing……
- VXDIAG SDK Driver installing……
- Setup complete. Click [Finish]. The shortcut will be created on the desktop.

Connect the device and run VX Manager; the device information will be displayed in “Device Manager.”
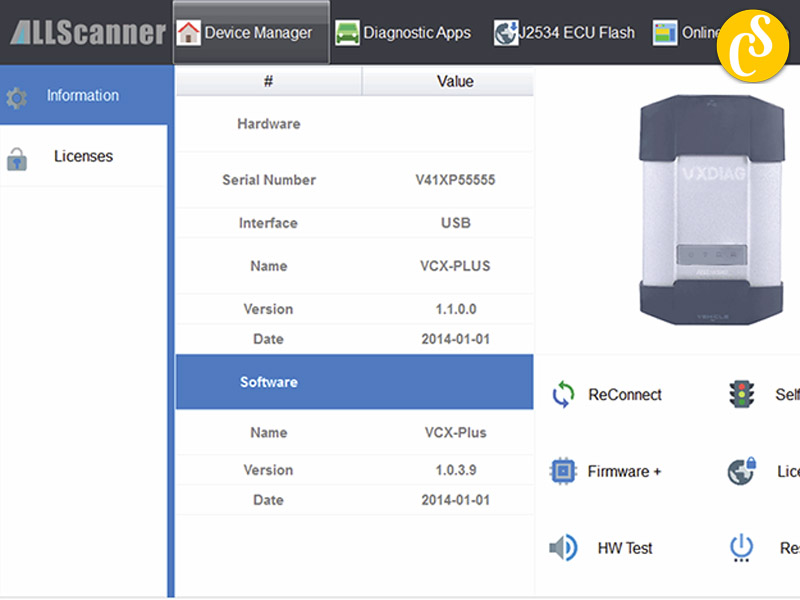
Step 2: VXDIAG Connection
Hardware Connection Modes:
- USB Connection
- WiFi Connection
VXDIAG USB Connection
- Connect the OBDII cable to the vehicle’s 16-pin diagnostic port and the USB cable to the computer.
- After device boot completion, the power LED will flash, and the buzzer will prompt.
- Install the USB driver based on the Windows version.

VXDIAG WiFi Connection
- Connect OBDII cable to the vehicle’s 16-pin diagnostic port, and connect the computer to the device through WiFi.
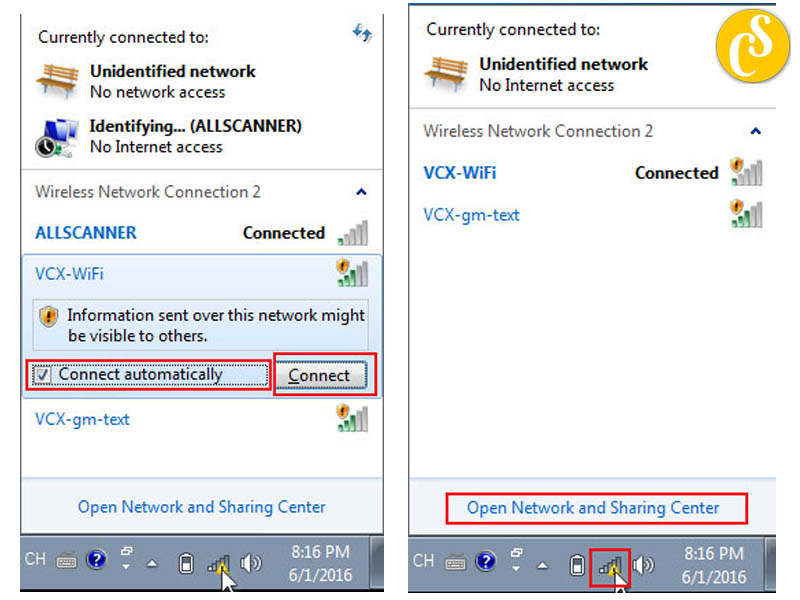
- Click VCX-WiFi, check [Connect automatically], then click [Connect].
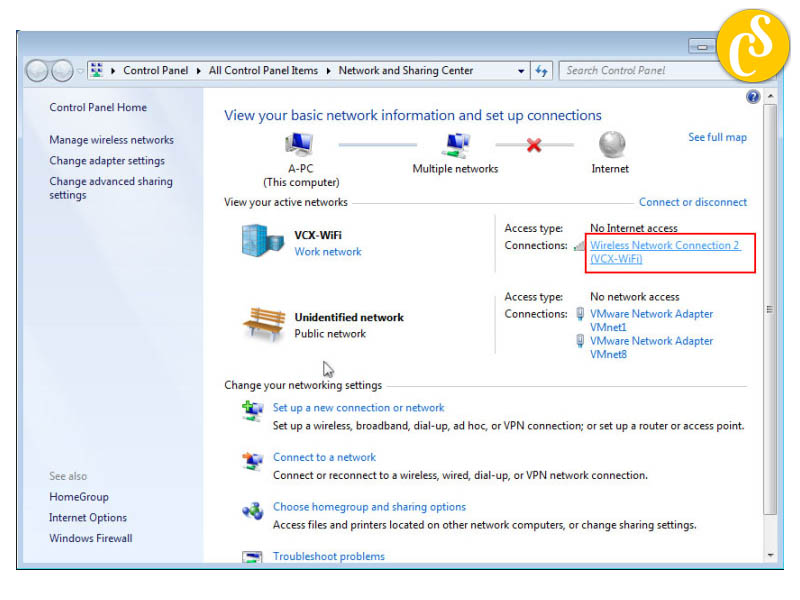
- Set to obtain an IP address automatically.
Step 3: Install JLR SDD driver
Ensure the license is purchased and updated, the device is connected, and the network is established or error-free.
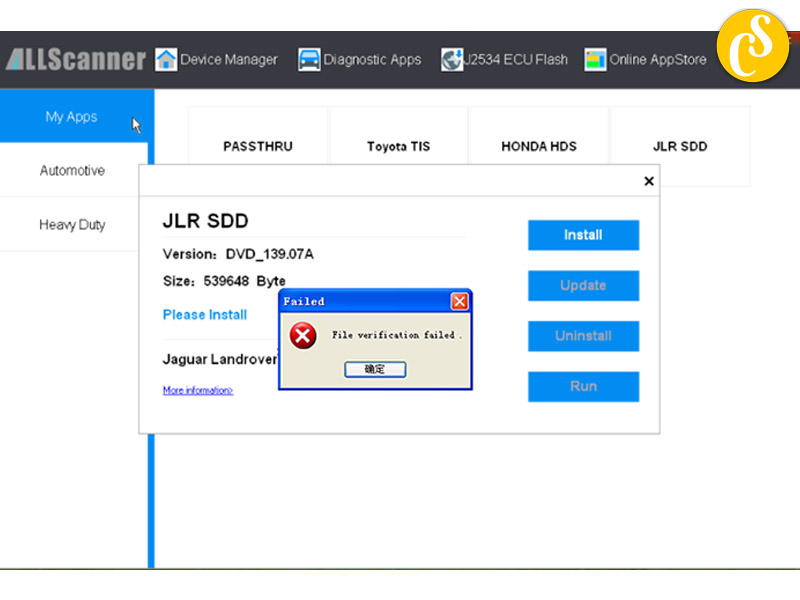
- VX Manager can manage multiple original diagnosis functions.
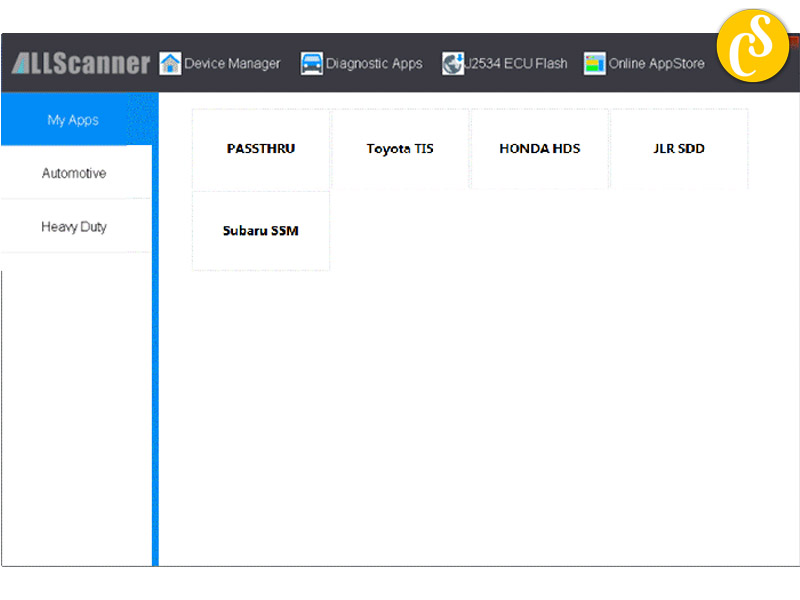
- To use the original factory diagnosis functions, purchase the corresponding license and install the relevant vehicle diagnosis driver (e.g., JLR SDD driver).
Driver Installation
- Click [Diagnostic Apps] -> [My Apps], then click [JLR SDD], initiating the driver installation window.
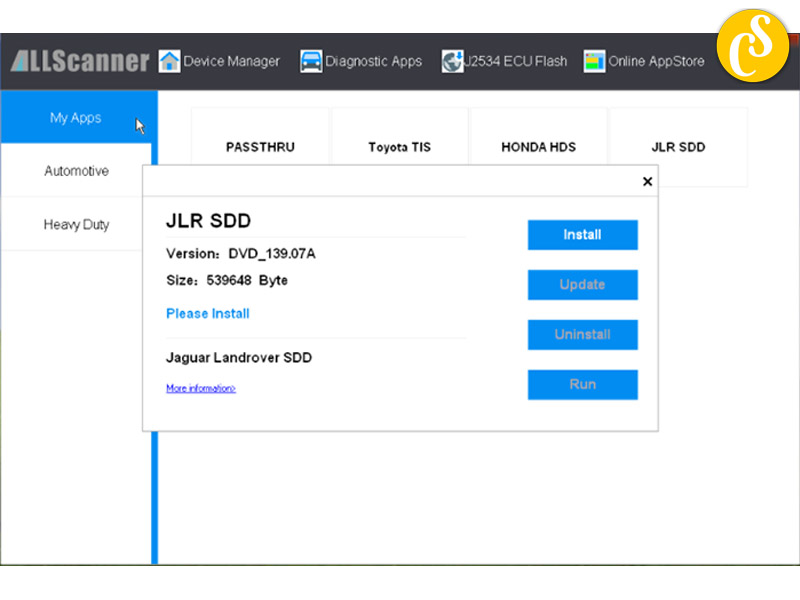
- Click [Install], and VX Manager will download the newest diagnostic driver from the server.
Driver Update
- Click [Diagnostic Apps] -> [My Apps], then click [JLR SDD], initiating the driver Update window. Click [Update].
- VX Manager will download and install the latest diagnostic driver from the server.
Step 4: VXDIAG Firmware Upgrade
- Connect VXDIAG to PC.
- Start [VX Manager].
- Click [Device Manager].
- Click [Information].
- Click [Firmware].
- Click [Upgrade] to Upgrade Firmware. During the upgrade, do not disconnect VXDIAG connected to PC.
Related Posts:
Download and Installation Land Rover Jaguar JLR SDD Software V164
JLR Pathfinder Diagnostic Software Download And Installation
How To Install VXDIAG VCX SE DOIP VCX NANO Driver For JLR SDD
How To Setup JLR DoIP VCI For SDD and Pathfinder
When To Use Pathfinder, SDD or IDS for Your Jaguar Land Rover Range Rover
CARSOFTZ – Your Diagnostic Journey, Our Software Excellence
- Website: Carsoftz.com
- Youtube: Carsoftz Official
- Fanpage: Carsoftz
Whatsapp: +84.977.889.159| Open: 8:00 – 22:00 (GTM +7)

